
photo from amazon
This is my favorite pool lounger!
Unfortunately the one I had died this year. After being shocked at how expensive it was to replace, I went to the store to see if I could find fabric to fix it. I did and decided to make a pool hammock as well! I found this great mesh that doesn't have any stretch to it.
I bought about 3 1/2 yards because I was unsure how much I needed for the repairs and for the the hammock. It wasn't on sale but I had a 20% coupon from JoAnn's. They text me coupons--very handy.

My kitchen table was occupied by several computers or a game which is not unusual.
So I went for the sunny spot on my front porch to work with this black fabric.
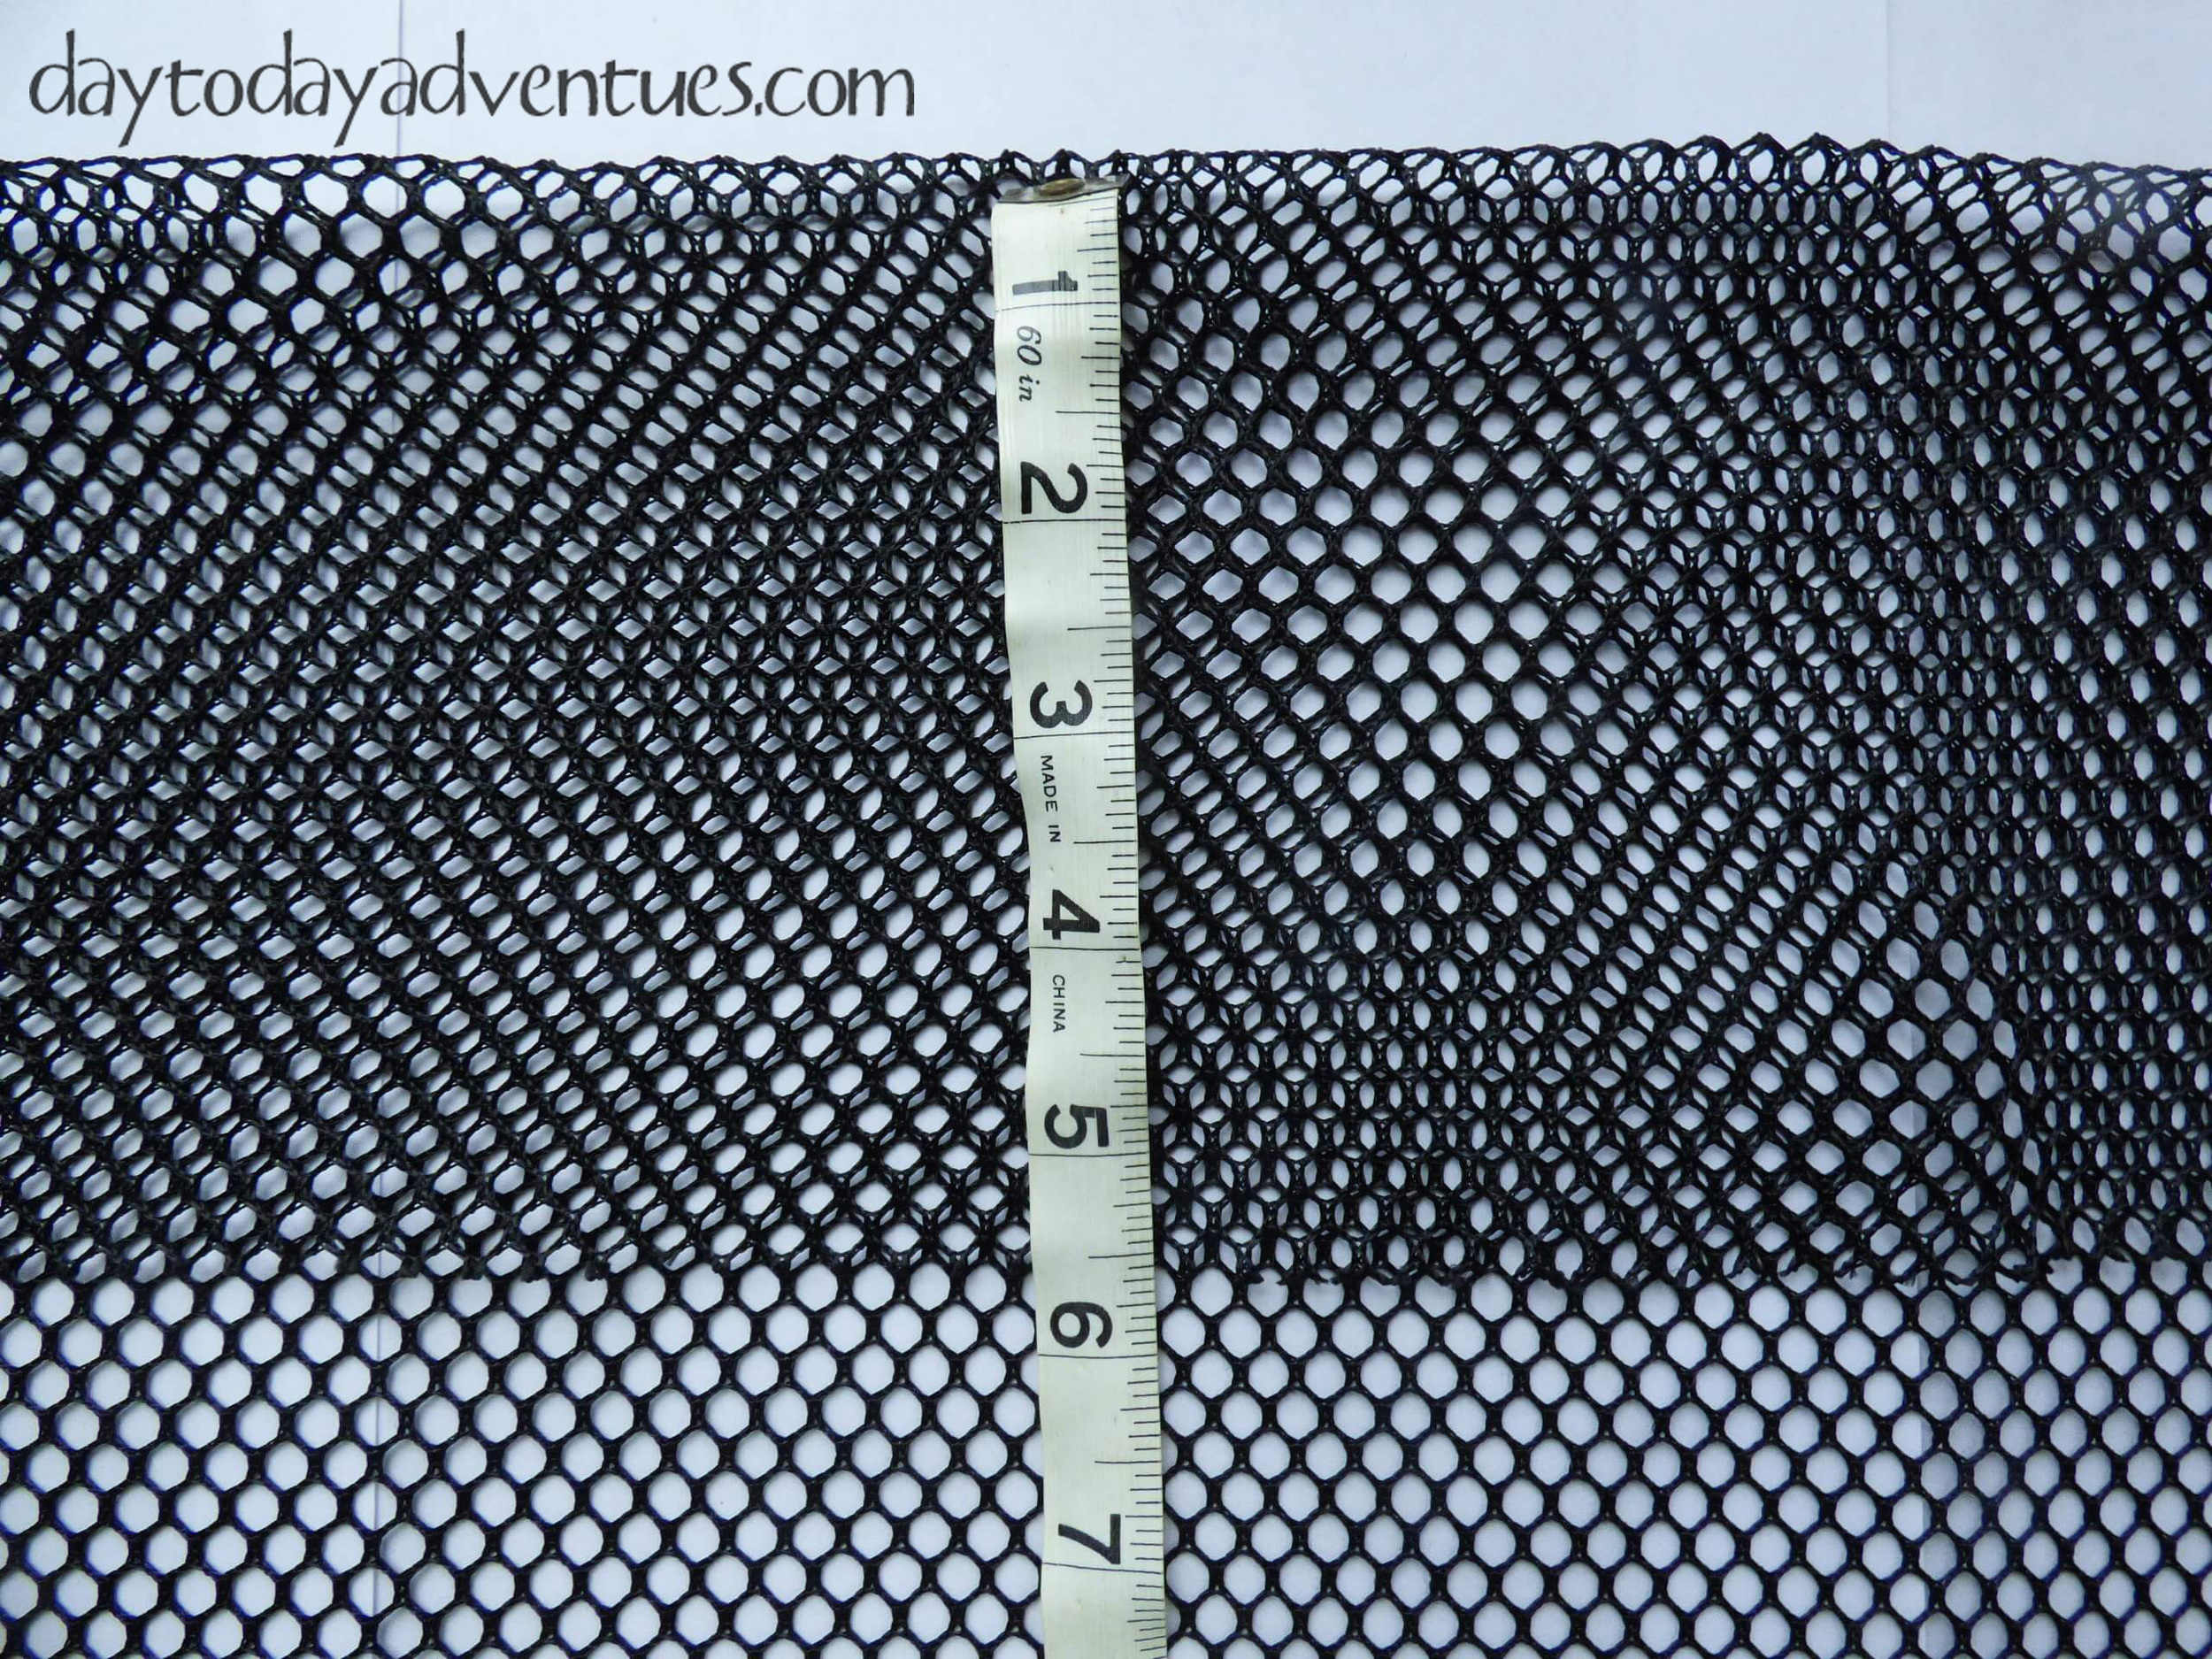
It would've been difficult to see on my hardwood floor. So the lighter colored concrete worked well for seeing where to cut the mesh.
After laying it out I cut 29 inches by 62 inches for the hammock. The 62 inches includes 5 extra inches that would wrap around the pool noodle at both ends. I used a large 3 inch pool noodle. I had no idea there were different sizes until I did this project.

I am 5 foot 3 inches. When I used the hammock in the pool it was a bit long for me. It worked great for my taller son but the shorties need one that is about a foot shorter.
After cutting, I "hemmed" the edge that wasn't the finished(selvedge) edge to keep it from unraveling. By hemming, I mean that I turned the mesh under about 1/4 inch and then turned it under again and pinned it. I didn't iron it as the mesh was easy to pin and keep in place.

This is such an odd picture. As you can see I used a contrasting thread. My mesh is black but somehow in the picture it has taken on the blue of the thread. Anyway . . . . .

If I had to rip out anything I wanted it to be easy to see. I also used a pattern that would add more stability to my "hemming" A straight stitch might miss some of the mesh pattern. I did'nt do a regular zig zag but you could do that. I just felt like using a stitch I don't normally use and it worked well.
After the zig zag on the long MEASUREMENT edge, I did the same on both MEASUREMENT ends. Then I folded the mesh over 6 inches and sewed it in place. I used a straight stitch(not pictured)
The picture below was taken before I hemmed the end. So the measurement is 5 1/2 inches. The 1/2 inch is used up in the "hemming" process.
I then inserted the pool noodle to make sure that it would fit. It was snug but not too hard to push it through the fabric. It was good that it was snug. I didn't want it to slide out in the pool.

I repeated the process for the other end. That's it. Pretty easy to do and saved me some bucks on pool loungers this year! I also still have a large scrap of the mesh that I can tuck away to use later on another project.
**NOTE**
I shortened the length on my hammock.
I love it!
(I can't believe I'm putting a picture up of me in the pool.)
Recent Posts