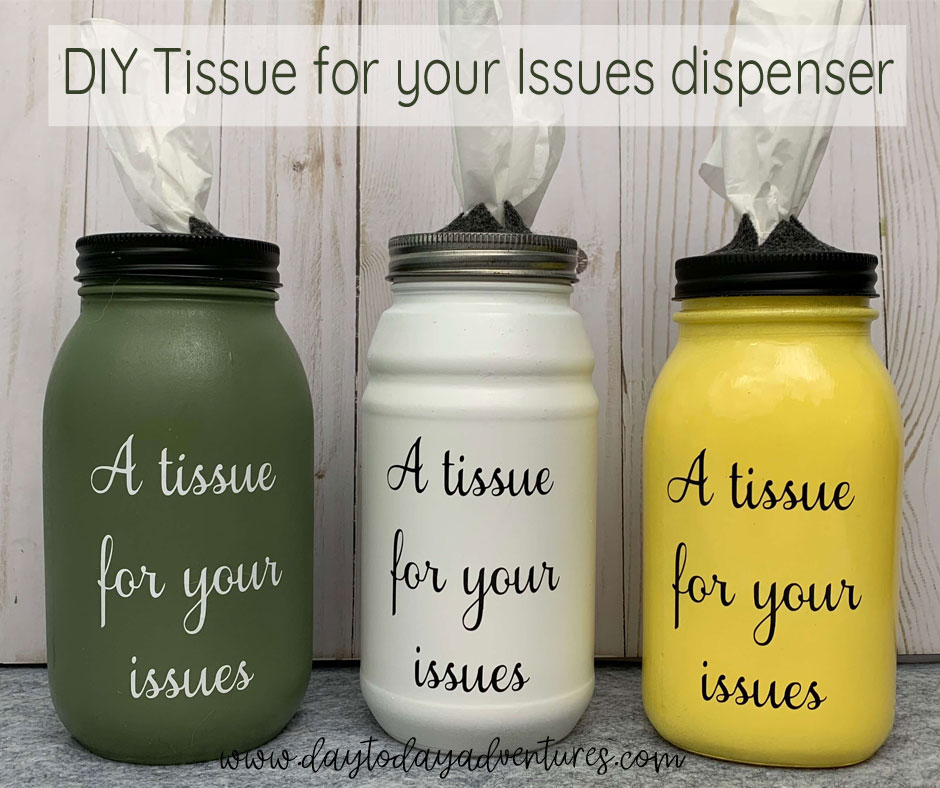
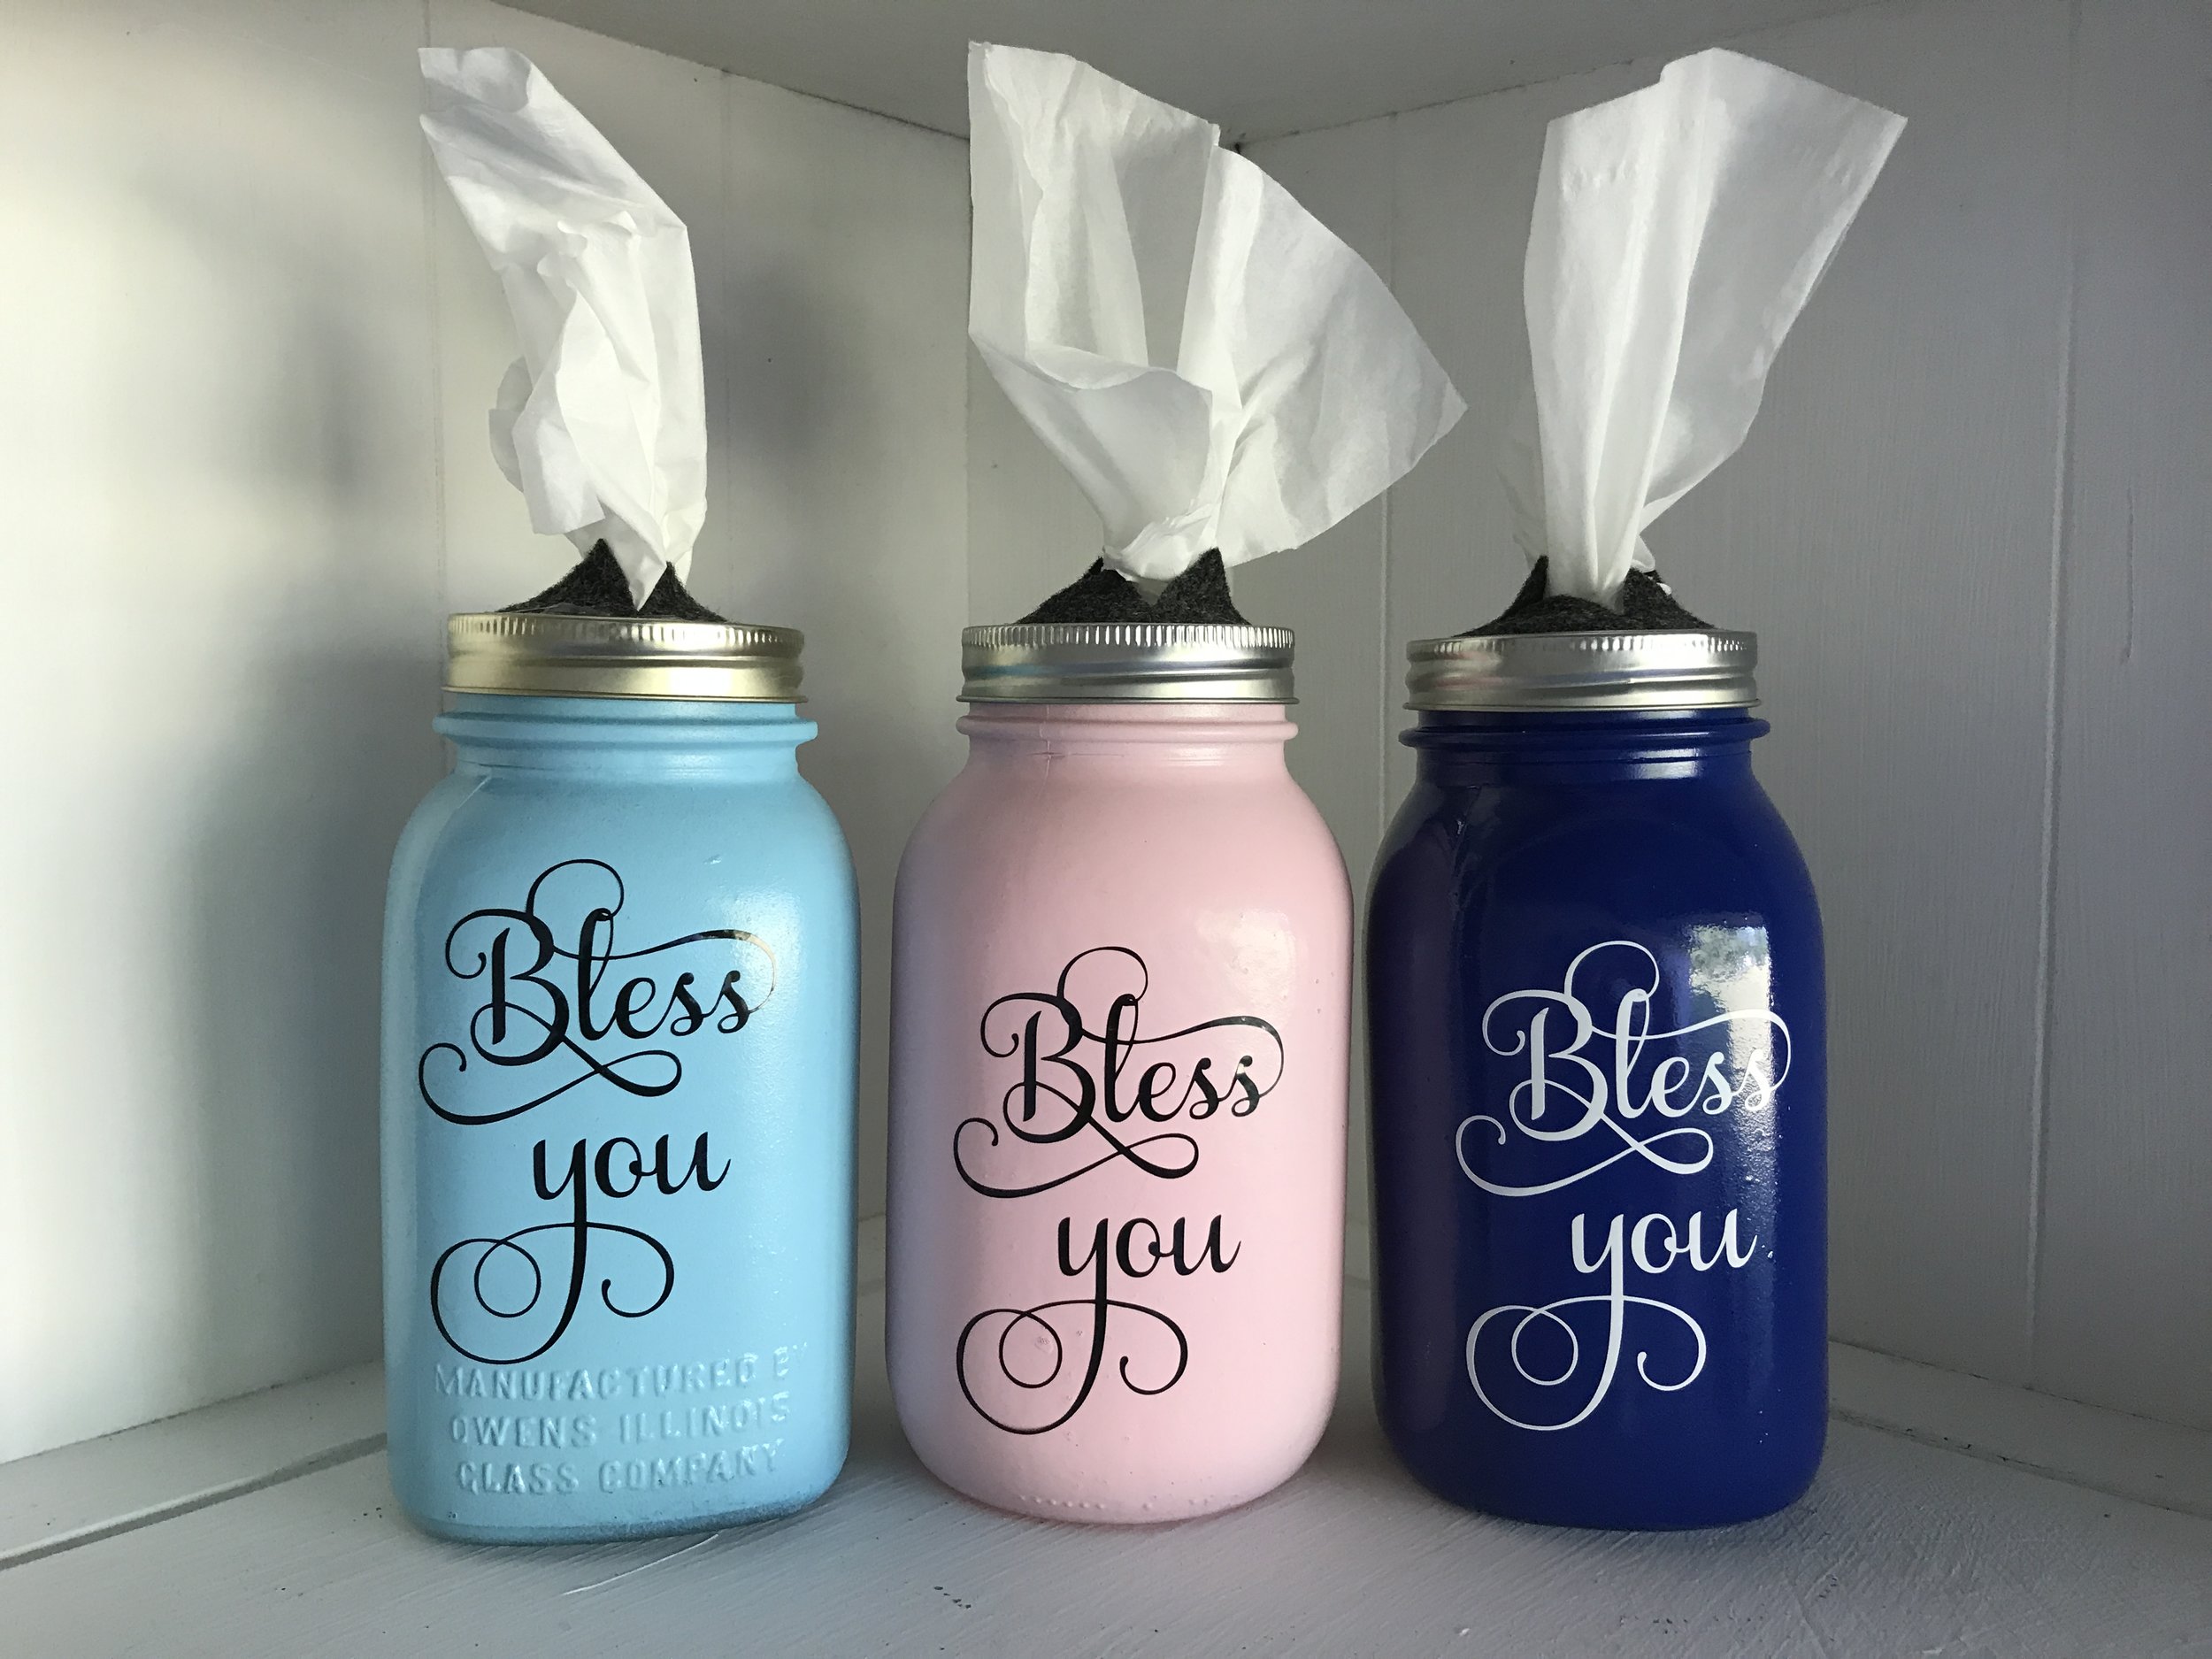
I have a confession to make. Mason jars are my addiction. I can't NOT buy them at a garage sale. My daughter says that I have "jar" a problem. She's probably right. Last summer I started up-cycling some of my "extra" jars (Translate: I had run out of space and needed to share some of the love with friends) into Bless You jar tissue dispensers!
I participate in the Amazom.com affiliates program. If you make a purchase after following one of my affiliate links (like the ones above) I earn a small commission, but it does not affect the price you pay. For more information please see my disclosure page. Thank you for supporting Day to Day Adventures.
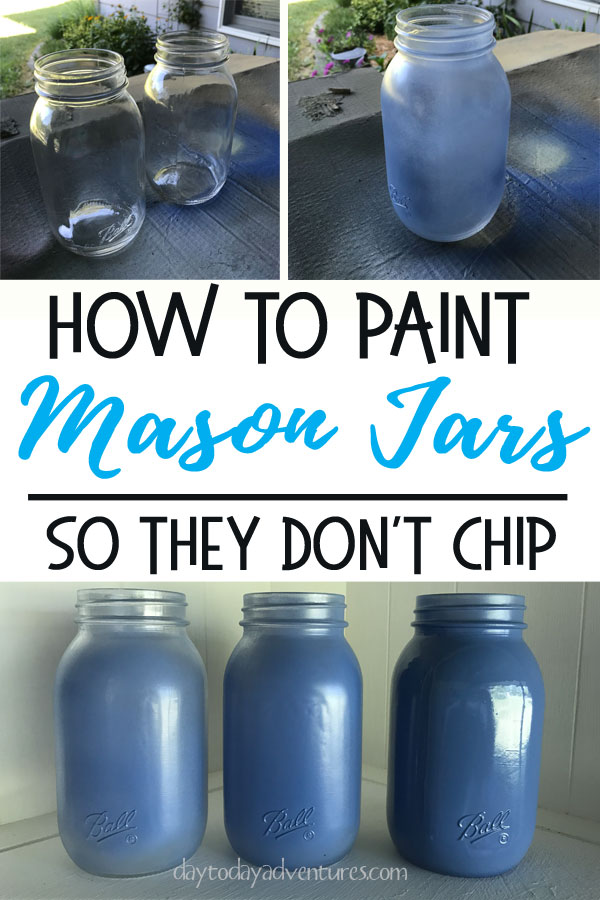
How to paint mason jars so they don't chip
My big frustration was that glass is HARD to spray paint! I kept having the paint chip off after the painting and there really wasn't a fix so the jar was ruined.
BOO! So I've been doing some research and experiments on how to paint glass in a way that minimizes the chipping. This is the method that I now use. It takes a little longer but is giving me much better results!
Want to skip the DIY but need the the digital cutting file? Its just $3 Don't have a cutting machine available? Purchase decals for $5! FYI my store front is run through my home decor and gift business, Blue Daisy Dreamer.
Supplies needed for Mason Jar tissue holder
- Smooth-sided quart Mason Jars or a jar about that size (like spaghetti sauce jars)
- Spray paint or chalk paint--I like to use matte or satin finish
- Newspaper or cardboard to protect your surface
- Foam Brush
- Spouncer or sponge makeup wedge
- Waterbased clear matte Polycrylic
- Silhouette or Cricut cutting machine
- Transfer Tape
- Oracal 651 vinyl
- Glue gun
- Craft Felt
- OLFA Rotary Circle Cutter
- Kleenex Facial Tissues Perfect Fit
- Bless You Decal OR Bless You digital SVG cutting file to use on your Cricut or Silhouette.
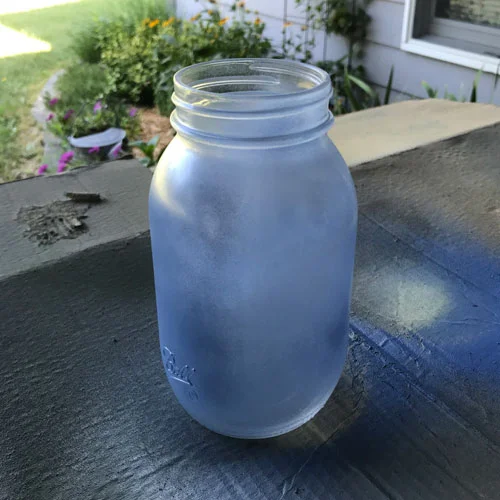
1. Clean your jars. I just wiped mine clean but you could wipe them with alcohol.


2. Use the foam brush to "paint" a layer of Polycrylic on the jar. Let it dry 30 minutes.
3. Paint your jars. IMPORTANT!!! If using spray paint, be sure to shake your can REALLY well and hold the can 10-12 inches away from the jar so you don't get too heavy of a coat which might make it drip. 2-3 LIGHT coats will prevent the paint from running or dripping on your jar.
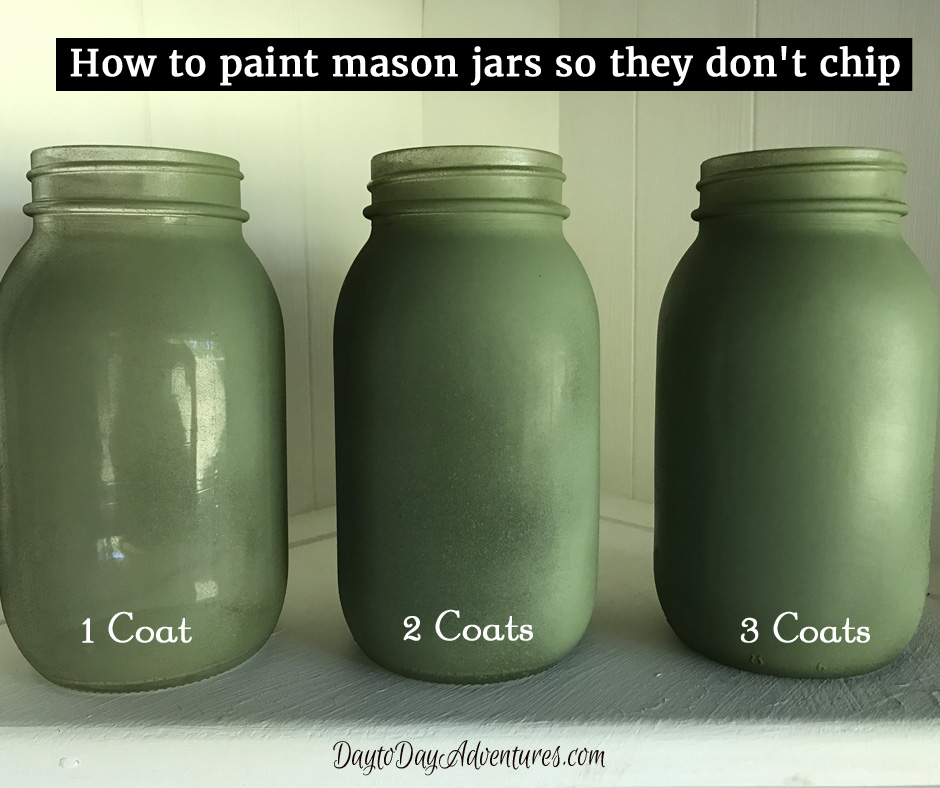
If you want to use chalk paint, then use the spouncer or sponge to avoid the brush marks in your paint. 2-3 light coats works best.
I prefer the spray paint because it goes a lot faster! I also like the finish of the spray paint as well but chalk paint looks great too! Let the paint completely dry.
4. Use the foam brush to "paint" a layer of Polycrylic to seal the paint on the jar. Let it dry until the paint is not tacky.
5. Preheat your oven to the lowest heat(about 170 degrees Fahrenheit) and then bake your jars for 20 minutes.
I've tried bumping the jars together after this process and NO CHIPS! yay!
Instructions to make Bless You jar tissue dispenser
6. To finish the project: Design and cut the vinyl words "Bless You" using your favorite swirly font OR purchase the digital cutting file from my other business, Blue Daisy Dreamer! I used Oracal 651 vinyal and my Silhouette Cameo machine (you could use a Cricut as well) to cut this decal.
Don't have a cutting machine available? Purchase a decal for $5!!!
* NEW Mason Jar POST *
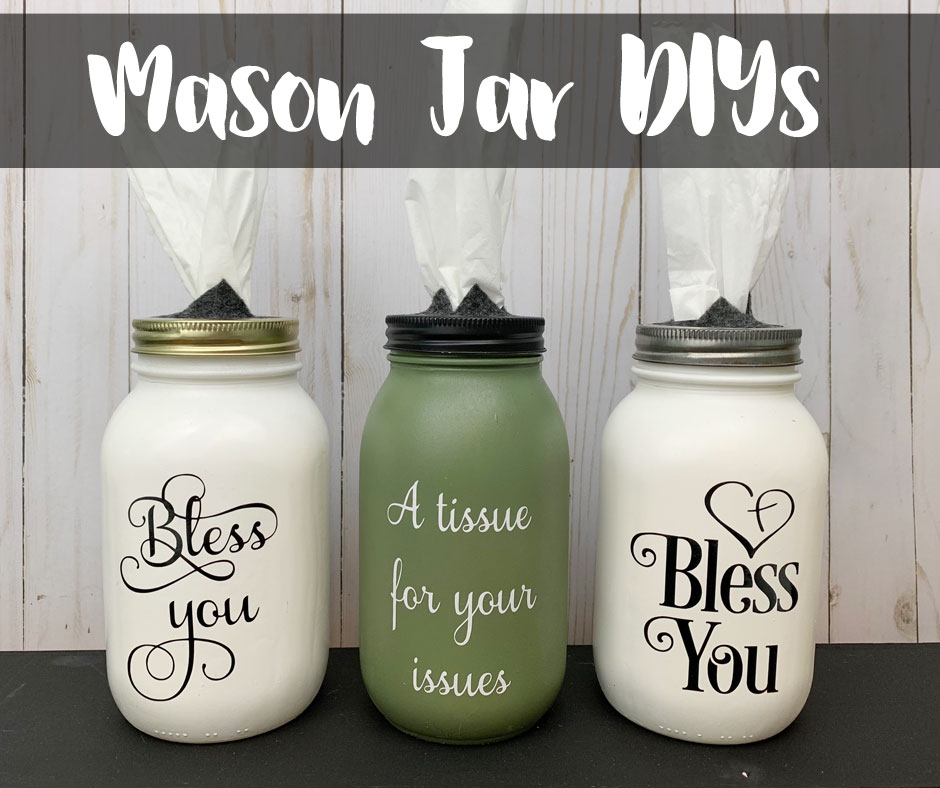
7. Apply the decal to your jar using Transfer Tape.
8. Cut a 2.5 inch circle of felt and then cut an X in the center of the circle. Using a glue gun attach the felt circle to a metal lid.
9. Fill your jar with Kleenex (Kleenex Perfect Fit Tissues work great for this) while holding out the center tissue. Pull the tissue through the cut in the felt and screw on the lid.
Want to see the whole Mason Jar painting process? Watch the following video!
These cute jars make wonderful gifts for teachers, friends and many more! Be sure you pin this post so you can come back to it later!
Shared on Hazel & Gold's Linkup!
What to read next